If you have worked with the Windows Server 2008 R2
Server Core edition, you might have troubled with more complex configuration on
the server. In Server 2008 R2 you had the Sconfig utility in the command
prompt, where you could make standard server configuration tasks, like rename
the server, changing the IP settings and so on. Because of the lack of
graphical utilities, many administrators choose to install the full GUI version
of Server 2008 R2 instead of the much better performing and more secure server
core edition.
These days are over now, because in Windows Server
2012, you can switch from a server core edition to a fully GUI version and vice
verse. This gives you the option to run almost all roles and features on high
performance server core editions, and if you need to make more advanced
configuration that needs the GUI, you enabled the features, reboot the server,
make the configuration changes, and finally switch back again.
The process is unfortunately not as straight forward
as it sounds, because the Server Core edition isn't shipped with all the
necessary files needed to install most of the features, including the graphical
shell and management tools. Because of that you need to make those files
available to the Server Core server when you need to add those features. This
can done in different ways, and in this blog, I will focus and demonstrate the
most efficient way to do this.
By default, when feature files
are not available on the target server, Features on Demand searches for missing
feature files by performing the following tasks, in the order shown.
1. Searching in a location that
has been specified by users of the Add Roles and Features Wizard, DISM
installation commands or in Powershell commands.
2. Evaluating the configuration
of the Group Policy setting, Computer Configuration\Administrative
Templates\System\Specify settings for optional component installation and
component repair
3. Searching
Windows Update
You can read more about Features on Demand here:
http://technet.microsoft.com/en-us/library/jj127275.aspx
1. How to install GUI features by
specifying the location of source files
In this way you need to provide the location for the
source files (installation media or WIM file). This can be a suitable solution
if you only got a few servers to manage. But if you administer many servers,
this method will end up eating your time, and may in the end make you choose to
use servers with a GUI instead of a server core. If you find this manually
process to time consuming, you may want to use the Group Policy to provide the
location for the source files, and you can read more about how to accomplish
this in section 2 bellow.
You can make the transition either from the local
Server Core server or remotely from a Windows 8 client with the Remote Server Administration Tools (RSAT) installed and the Server Manager
console enabled or from a Server 2012 or Server 2012 R2. In either way you
manually need to specify the location of the source files or WIM file.
You can download RSAT for Windows 8 here;
http://www.microsoft.com/en-us/download/details.aspx?id=28972
In the following you can see a step-by-step
demonstrating how to switch from a Server Core server to a GUI server both
locally (A) and remotely from Server Manager (B).
A: Making the switch locally from
the Server Core server
1.
On the Server Core
server you need to make the installation files or WIM file available. In this
demonstration I mount the Install.wim file to a local folder called “mount”.
The content of the
Windows Server 2012 R2 installation media
Create the new “mount” folder
Using the Dism.exe
command to mount the install.wim file to the “mount” folder. The Index
parameter specify the image in the WIM file that you mount, and in this case
index 2 is the GUI version which include all the files needed.
If you don't know the index number of the GUI image in your WIM file, you can use the following Dism command to view the index numbers.
dism.exe /get-wiminfo /wimfile:D:\sources\install.wim
2.
When the process
finish, you are ready to install the GUI features. You do this in Powershell.
Open Powershell by writing “powershell” in the command prompt.
Then write the
following powershell command, where you replace the Source path with your
actual location. If you have placed the installation files on a network share,
you can use this as source path in the command.
You will notice
that the installation progress will be at 68% for a relatively long time, but
it will proceed eventually.
3.
When the
installation has finished you need to restart the computer either by using the shutdown
/r /t 0 command or by the sconfig
utility choosing the 13. option.
4.
The reboot process
will take a while, and when finished, log on to the server and now you got a
GUI server.
5.
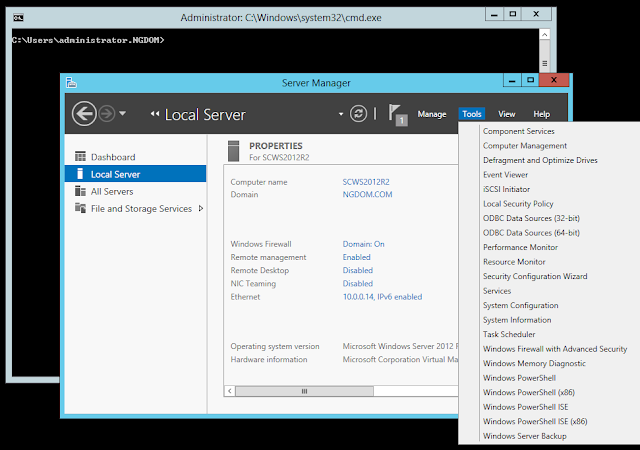
If you need to
uninstall the GUI or part of it, you can do this from the Server Manager
console or from Powershell. In Server Manager, click on Manage and then Remove Roles
or Features. Click Next a couple
of times until you enter the Remove
features windows. Scroll down to the User
interfaces and infrastructure section and read the description text of the
three features.
Be aware that the Graphical
Management Tools and Infrastructure provide the server with minimal server
interface and GUI, including the Server Manager console and related tools,
where the Server Graphical Shell
feature provides the full GUI, including File explorer etc..
6.
You can also
uninstall one or both features in Powershell, by running one of the following
commands:
Uninstall-WindowsFeature
–User-Interfaces-Infra
Removes all GUI features
Uninstall-WindowsFeature
Server-Gui-Mgmt-Infra
Removes the Graphical
Management Tools and Infrastructure
Uninstall-WindowsFeature
Server-Gui-Shell
Removes the Server Graphical
Shell
You can run either
of the commands with the –WhatIf to get a listing of the installation summary before actually executing the command.
This summary lists any other features that will also be uninstalled at this
time.
7.
If you choose to run
the server with minimal server interface, just uninstall the Server Graphical
Shell and restart the server. Then the server will run as a Server Core server
but providing access to graphical consoles like Server Manager, Event Viewer
etc..
B: Making the switch remote from
the Server Manager
To administer your Server Core servers centrally,
Server Manager provides the ability to create Server Groups, where you can add
all you servers for remote administration, including the possibility to switch
from a Server Core to a GUI server and vice verse.
1.
On a Server 2012 or
Server 2012 R2 or a Windows 8 computer where you have installed RSAT, open the Server Manager console
and from the Dashboard create a new server group. Then add your servers you
want to administer and place them in your new group.
2.
Right-click the
Server Core server you want to switch to GUI, and select Add Roles and Features. Click Next
a couple of times until you reach the Select
features windows. Expand the User
Interfaces and Infrastructure section and select the features you need to
install.Click Next.
3.
On the Confirm installation selections page,
be aware that you can specify an alternative
source path, pointing to the installation files or a WIM file.
4.
In this
demonstration a have copied a WIM file to a server share and I use the WIM: prefix to specify the WIM file and
the index number to specify the GUI
based server image in the WIM file.
5.
Then select the Restart the destination server
automatically if required option
6.
Wait for
installation to finish and verify that the Server Core server restarts
automatically.
2. Using Group Policy to
specify the location of the source files.
The second step in Features on Demand list gives you
the opportunity to place the installation files or WIM file in a central shared
folder and make the location of the source files available to your Server Core
servers through Group Policy. This is a nice and easy way to centrally control
the source files and access rights to the files and if you use a WIM file you
can constantly upgrade features, language packs etc. to the images in the WIM
file with the Dism.exe command utility.
In the following demonstration I will guide you
through the necessary steps to switch from a Server Core server to a server
with GUI using source files from a server share, located by a Group Policy.
The main steps in the
demonstration are:
A. Manage the servers
in Active Directory
B. Create a folder for
the source files and assign the appropriate access permissions.
C. Copy the source
files to the folder
D. Create and
configure the Group Policy Object (GPO)
E. Apply the GPO to
the Server Core servers
F. Install the GUI
features
1. I will strongly
advise you to create specific OU’s in your Active Directory for your servers
based on functionality, server editions etc. In this demonstration I have
created an OU named Servers (to keep it simple) and placed the Server Core
server in the OU. I have also created a global security group named ServerCore where
I have added the server.
2. On a file server,
create a folder. Share the folder with the appropriate share permissions. In
this case I assign Read permission to the ServerCore group
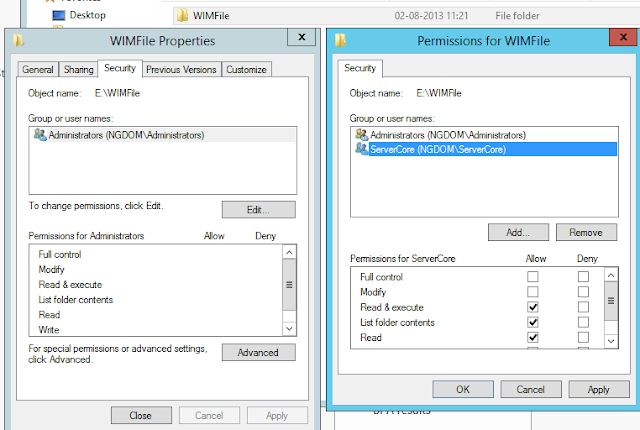
3. Assign the
appropriate NTFS permissions to the folder. In this demonstration I have
assigned Read permission to the ServerCore group
4. Then I copy the WIM
file to the folder. In this demonstration it is the install.wim file from the
installation media.
5. Open the Group
Policy Management console and create a GPO and then link the GPO to the Servers
OU (your AD design may vary from this). I have named the GPO ServerGPO for
simplicity.
6. Right-click the GPO
and select Edit. From the Group
Policy Management Editor, expand Computer
Configuration – Policies – Administrative Templates – System and locate and
double-click on the policy setting named Specify
settings for optional component installation and component repair.
7. Read the help text.
Enable the policy and provide the alternate source file path. In this
demonstration I have used the WIM: prefix with index number 2. The index number
may vary from this. Click OK and
close the editor.
8. Boot your Server
Core server, or if already booted, run the
gpupdate
/force command. To verify that the GPO is applied, you can run the gpresult /r command.
9. To switch from
Server Core to server with a GUI, you either do it with Powershell locally on
the Server Core server
(using the Install-WindowsFeature cmdlet), or remotely
from Server Manager (both ways described in section 1 of this blog).
In this case you
will be asked to provide location for the source files, because the server
already knows the path.
Summary: The Windows Server 2008 R2
server core has been a little scary to a lot of administrators because you
practically only had the prompt to work in. In Windows Server 2012 and Server
2012 R2 you can easily switch back and forth between a server core and a minimal
or full GUI version of the server, and because of that you will probably begin
working a lot more with the much better performing and more secure server core
edition.


